You probably heard of React-Native-Web, allowing to render React-Native views on the web.
So, what about using React-Native in a Gatsby website?
This post is a proof-of-concept: it contains React-Native and Expo interactive components, embedded directly into this article (using MDX), of my open-source Gatsby site.
If you are not familiar with the React-Native ecosystem:
- React-Native-Web: it is like a CSS-in-JS library (similar to Emotion or styled-components) that reuse the existing React-Native APIs. It has interesting properties (like atomic CSS-in-JS).
- Expo: it is like an extension of React-Native: it provides a large SDK with much more APIs than core React-Native (camera, battery, video, audio, qrcode…), enabling you to build more complex experiences.
The idea is that I can use such code in my Gatsby site:
1import { TouchableOpacity, Text } from 'react-native';23export const MyTestButton = () => (4 <TouchableOpacity5 onPress={() => alert('onPress')}6 style={{7 padding: 10,8 backgroundColor: 'blue',9 borderRadius: 5,10 }}11 >12 <Text style={{ color: 'white' }}>Click me</Text>13 </TouchableOpacity>14);
And it should work fine in my Gatsby pages, but also in MDX content:
1# Blog title23blabla this is a MDX blog post using an embedded RN button:45import { TouchableOpacity, Text } from 'react-native';67<TouchableOpacity8 onPress={() => alert('press')}9 style={{10 padding: 10,11 backgroundColor: 'blue',12 borderRadius: 5,13 }}14>15 <Text style={{ color: 'white' }}>Click me</Text>16</TouchableOpacity>
Let’s run this Hello world code and see if it works:
Why ???
- blogging about React-Native
- cross-platform: sharing code between your mobile app and a static website
- using React-Native-Web, as it’s a performant atomic CSS-in-JS library
I have good hope to see more React-Native developers embed runnable code in their blogs, like I did in this post.
Demo time
Keep in mind that all the demos are written in a cross-platform way, using only React-Native and Expo apis.
All these demos can also run (natively) in iOS and Android (natively).
There’s no usage of a single div, or any direct browser or DOM api usage.
So, let’s start with a simple one. Can I render a complex svg with react-native-svg? Yes!
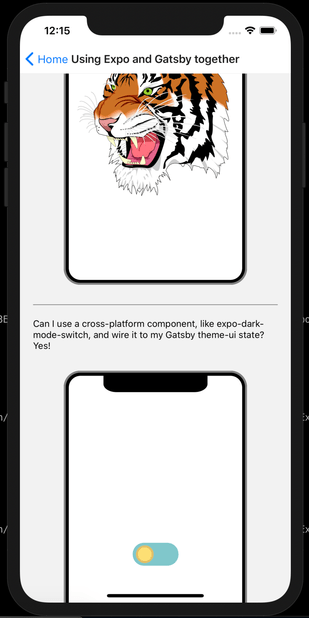
Can I use a cross-platform third-party component, like expo-dark-mode-switch, and wire it to my Gatsby theme-ui state? Yes!
Can I ask your permission to use your camera, and reveal it with a fade-in animation? Yes!
Can I use more complex gesture-based systems? Yes! Demo credits to Evan Bacon.
Can I play a video? Yes!
Can I build an image picker, and enable a few image transformations? Yes!
In case you wonder what the code looks like, here’s a snippet for the camera demo.
You can find the rest of the code here.
1import { View, Text } from 'react-native';2import { Camera } from 'expo-camera';3import * as Permissions from 'expo-permissions';45import MobilePhoneView from 'components/MobilePhoneView';6import AppButton from 'components/designSystem/AppButton';7import AppRevealView from 'components/designSystem/AppRevealView';89export const ExpoCameraDemo = () => {10 const [showCamera, setShowCamera] = useState(false);11 return (12 <MobilePhoneView safeAreaPaddingTop={0}>13 {showCamera ? (14 <AppRevealView>15 <Camera style={{ flex: 1, width: '100%' }} />16 </AppRevealView>17 ) : (18 <View style={{ flex: 1, justifyContent: 'center' }}>19 <AppButton20 onPress={async () => {21 const result = await Permissions.askAsync(22 Permissions.CAMERA,23 );24 if (result.status === 'granted') {25 setShowCamera(true);26 }27 }}28 >29 Show expo-camera30 </AppButton>31 </View>32 )}33 </MobilePhoneView>34 );35};
gatsby-plugin-react-native-web v3
I created gatsby-plugin-react-native-web, and version 3.0 is now out of beta.
It uses under the hood @expo/webpack-config, which permit to get started fast without any config (thanks Evan Bacon).
Note: you can use React-Native and Expo with NextJS too. Evanbacon.dev is build with NextJS and Expo. You can use @expo/webpack-config on any project using Webpack.
After adding the required dependencies, you only need to add the plugin to gatsby-config.js, and nothing else is required (0 plugin config to provide).
This blog post does not need any fancy additional config to render properly.
Expo APIs, and your favorite React-Native libs, should work out of the box.
The best way to get started is to use the new Gatsby Recipes feature:
1gatsby recipes https://raw.githubusercontent.com/slorber/gatsby-plugin-react-native-web/master/recipe.mdx
Otherwise you can do these steps manually
Step 1
Add required dependencies to package.json
1yarn add react-native react-native-web@~0.11.7 gatsby-plugin-react-native-web
If you want to use Expo APIs, and advanced animations, you can install these too:
1yarn add expo react-native-gesture-handler react-native-reanimated
Step 2
Add the plugin in gatsby-config.js:
1module.exports = {2 plugins: [`gatsby-plugin-react-native-web`],3};
Step 3
Use React-Native and Expo components in your Gatsby site.
Check the React-Native-Web and Expo docs for available web platform support.
You can also browse libraries with web support on reactnative.directory.
Toward cross-platform content
All these demos use React Native and Expo code, and they can run natively on React-Native, because they only rely on React-Native primitives. These demos are embedded in this markdown post using MDX. Fortunately, MDX can be run on React-Native too!
This actually means that… my posts are cross-platform?
Stay tuned: in upcoming blog posts, I’ll show you how I run my cross-platform MDX blog posts inside an Expo app.

For a preview, scan my Expo QRCode, or take a look at the source code :)

Conclusion
We need more people to adopt cross-platform development, to make it mainstream and polished.
The setup to get started has never been so simple, it’s time to jump on the bandwagon, and get started with React-Native-Web.
Thank you for reading!
If you like it, spread the word with a Retweet
Browser code demos, or correct my post typos on the blog repo
For more content like this, subscribe to This Week In React and follow me on Twitter.
